Official California Detailing Blog
Car Window Tinting Process: A Step-by-Step Guide
(619) 760-4962 GET A QUOTE NOWLong commutes under the blazing sun can turn your car into an unbearable sauna, making every drive a challenge against heat and glare. Many have found themselves desperate for a solution, considering pricey professional services or struggling to find reliable DIY instructions online. To help you navigate this common dilemma, we've put together a comprehensive guide to the car window tinting process! This guide isn’t just another set of instructions; it's a result of meticulous research and hands-on experience in auto detailing.
The car window tinting process typically involves prepping the windows, taking precise measurements, cutting and shaping the tint film, applying the film using a soap and water solution, conducting final checks, and allowing the film to properly cure. This helps reduce UV rays and glare, extend the car's lifespan, preserve its interior, and reduce fuel consumption.
The Car Window Tinting Process
Car window tinting isn't just about darkening the windows; it serves to enhance your driving experience by blocking out harmful UV rays, reducing heat, and providing added privacy. Let's break down each step of this intricate process so you can grasp the level of detail involved in achieving the perfect result.
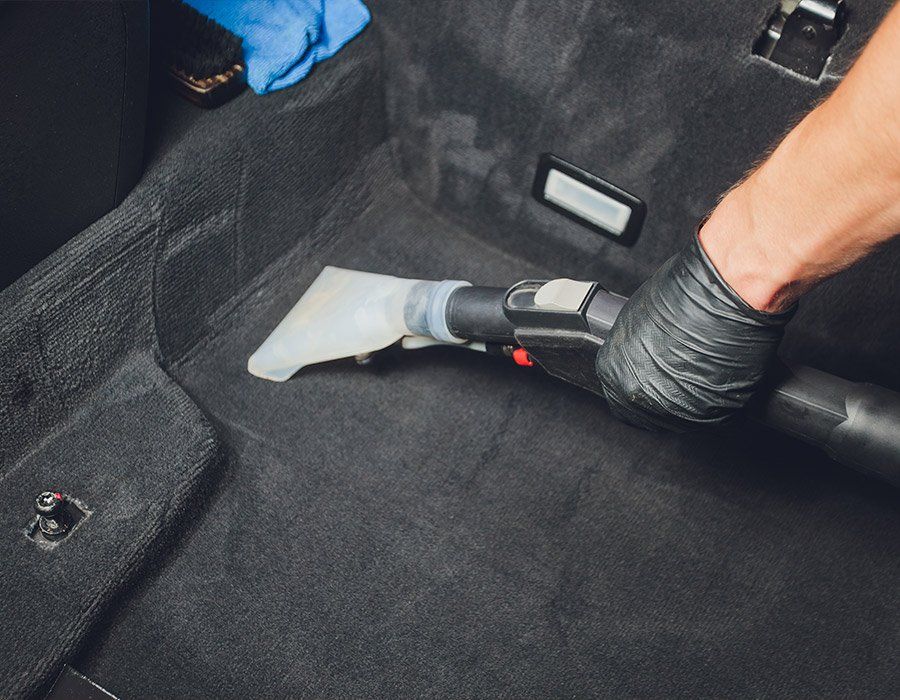
First things first, before any film is applied, the windows need to be squeaky clean. Dust and debris can interfere with the adhesive properties of the film, resulting in an uneven finish. A thorough cleaning not only ensures optimal adhesion but also creates a flawless surface for a seamless installation.
Once the windows are spotless, a soapy water solution is generously applied to act as a lubricant. This ensures that the film can be maneuvered easily into place without creasing or sticking prematurely. The solution allows the installer to adjust the positioning of the film for a perfect fit and alignment.
Next comes the precision task of measuring and cutting the film to fit each window perfectly. This requires meticulous attention to detail to ensure that there are no gaps or overlaps when the film is installed. It's all about achieving a smooth, uniform look while providing consistent coverage across all windows.
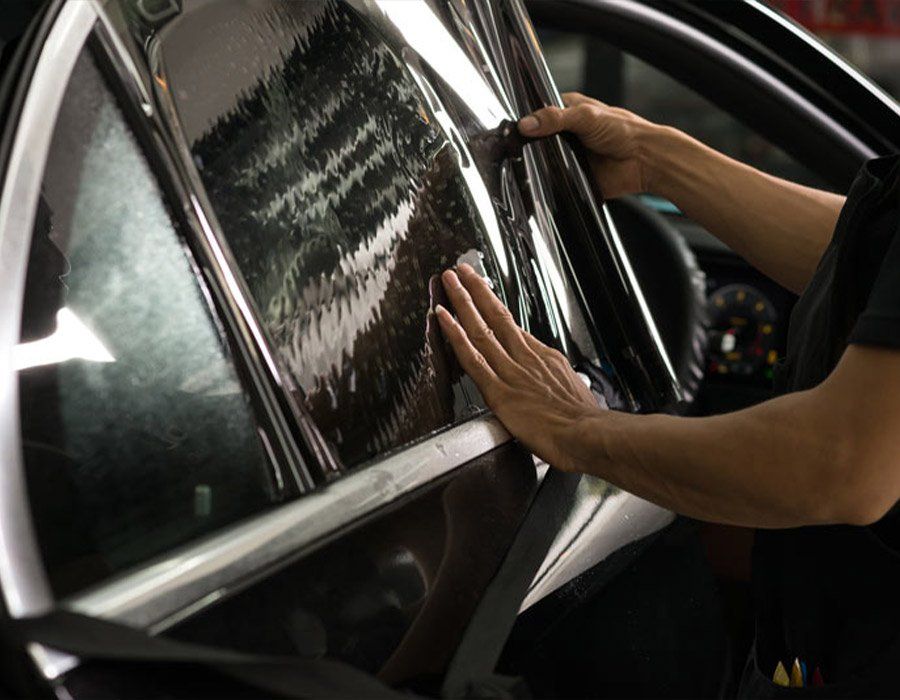
With the film cut to size, it's time for installation. Using a squeegee and a steady hand, the film is skillfully laid onto the glass surfaces. The squeegee is crucial in removing any trapped air bubbles and excess fluid from underneath the film. This step is critical in achieving an even application and preventing unsightly imperfections.
After the film is in place, any excess material along the edges is carefully trimmed away to create a clean, polished look. Trimming ensures that there's no interference with window mechanisms or weather stripping. The finishing touch involves drying any remaining moisture to complete the process.
From meticulous cleaning and precise measurements to expert installation techniques, every step contributes to creating a flawless finish that not only enhances the aesthetics of your vehicle but also provides valuable functional benefits.
Tools and Materials Needed
Getting the right tools and materials is crucial for a top-notch window tinting job. Here's what you'll need:
Tint Film Rolls
High-quality window tint film is the keystone of your installation project. Choosing premium film rolls ensures not only a smooth application but also long-lasting performance and durability.
Application Solution
You'll require an application solution to assist in the installation process. The solution can be a mix of water and baby shampoo or a commercial slip solution. This mixture helps ensure that the film can be adjusted during the application, providing flexibility for proper alignment before it sets.
Squeegee
An indispensable tool for a flawless finish, the squeegee is used to press the film onto the window and remove air bubbles. It's pivotal in achieving a smooth, professional result by securely adhering the film to the glass surface without creases or air pockets.
Heat Gun
A heat gun is vital for shrinking the film to fit the contours of the window perfectly. This step is crucial for achieving a seamless, wrinkle-free finish, as it allows the film to conform precisely to the shape of the glass.
Cutting Tools
Razor blades and knives are necessary for trimming the film to size, ensuring it fits accurately within the dimensions of each window. Precision and careful cutting are essential to achieving a neat and tailored fit for each pane.
Lint-Free Cloths
Clean, lint-free cloths are essential for both cleaning and drying the windows before and after the tint application. They help ensure that the surface is impeccably clean before installing the film, preventing any specks or particles from interfering with the application process.
Equipped with these tools, you can carry out a professional-grade window tinting installation that enhances your car's appeal while also providing practical benefits like UV protection, glare reduction, and improved privacy.
Step-by-Step Installation Guide
Getting ready to install window tint can feel daunting at first, especially for first-timers. But with the right techniques and some patience, you can achieve that professional finish you're after.
Step I: Cleaning the Windows
It all starts with cleanliness. Before applying the tint, it's crucial to have a clean surface. Here's what you should do:
Thoroughly clean both the inside and outside of the windows to remove any dirt, grime, or fingerprints using a trusted window cleaner and a lint-free cloth. This ensures that the tint adheres properly.
Step II: Measuring and Cutting the Film
Once your windows are squeaky clean, it's time to get the measurements right for the film. Measure the dimensions of each window accurately and cut the tint film slightly larger than the window size. This allows for a bit of wiggle room when fitting it on the window.
Step III: Applying the Solution
Now comes the clever part: ensuring no air bubbles stick underneath your tint film. Spray the soapy water solution on the window to create a lubricant layer that will allow for positioning the film without it sticking prematurely.
The soapy water acts as an essential buffer. It lets you adjust the position of your film until it's just right, ensuring a smooth application without leaving any wrinkles or bubbles behind.
Step IV: Positioning and Smoothing the Film
This step requires patience and precision to avoid air bubbles and ensure a uniform finish. Here's how you should approach it:
Place the film on the window, then use a squeegee specially designed for this task to smooth out air bubbles, starting from the center and moving towards the edges. Working gradually from the middle towards the edges will help eliminate air pockets as you go.
Step V: Trimming Excess Film
Now that your film is in place, it's time to give it that clean edge. Carefully use a razor blade or knife to trim any excess film from the edges of the window.
Step VI: Finalizing the Installation
Before concluding this installation process, there's one last detail left to cover. Use a heat gun to shrink the film to fit the window perfectly, and go over it with a squeegee once more to ensure all moisture and bubbles are removed.
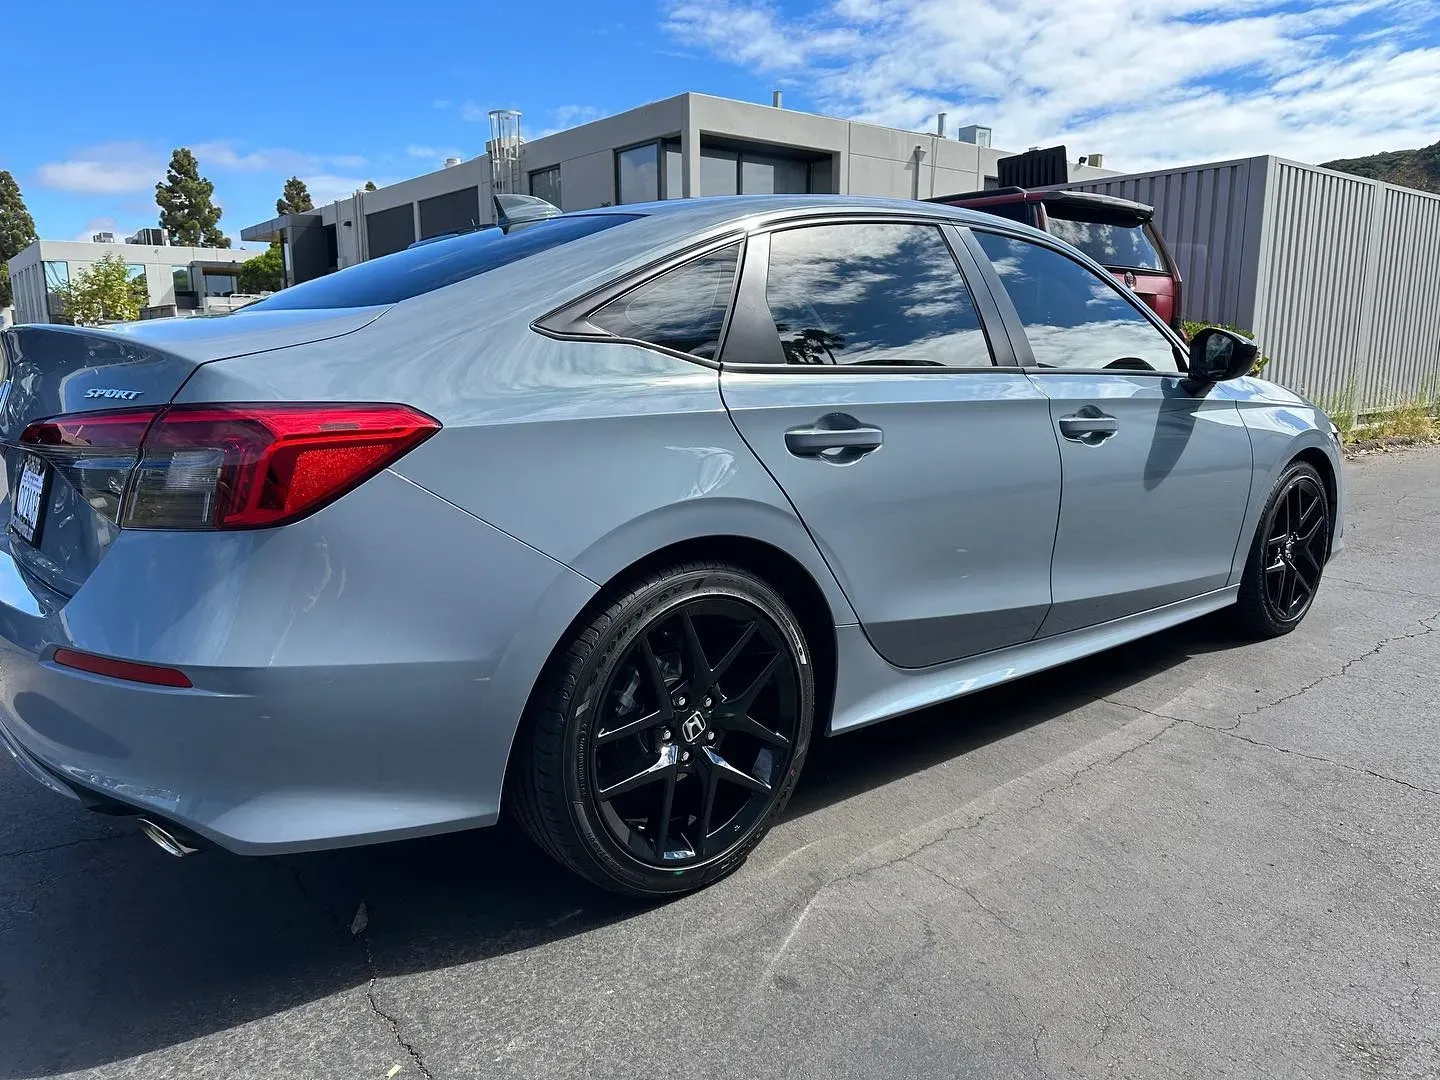
Congrats! You've successfully installed your car window tint like a pro—with patience and precision, your windows now look sleek while offering improved privacy and protection against UV rays.
These careful steps play an important role in achieving optimal results when installing car window tints. Now, let's shift our focus to creating ideal conditions necessary for flawless tinting.
Ideal Conditions for Tinting
The location where you choose to have your car's windows tinted can significantly impact the quality of the installation and the overall outcome. The right conditions are crucial for a seamless, long-lasting application.
A clean, controlled environment is essential for a successful tint job. Dust and debris can easily spoil the pristine look of newly applied tint film. A dedicated workspace, like a professional tint shop with proper ventilation and cleanliness control, ensures that no impurities get trapped under the film during the application process.
Moreover, temperature is critical; moderate temperatures ranging from 60–80°F (15–27°C) are considered ideal for the tint application. Extreme cold can make the film too brittle and prone to cracking, while excessive heat affects the adhesive properties, leading to bubbling and poor adhesion.
In addition to temperature, humidity levels should be considered. High humidity can hinder the curing process by trapping excess moisture under the film, potentially causing bubbles or a cloudy appearance.
Furthermore, ensuring proper lighting in the application area is vital. Adequate lighting helps installers detect imperfections and air bubbles during the application process, ensuring a flawless finish.
Understanding these ideal conditions helps you make informed decisions about when and where to have your car windows tinted for optimal results.
Benefits of Professional Tinting Services
When it comes to window tinting for your car, opting for professional services offers a range of advantages. Here are some key benefits that come with choosing a professional tinting service:
Expertise and Precision
Professional technicians are trained to deliver flawless installations with a keen eye for detail. This means no bubbles or creases in your tint, ensuring a sleek and polished finish. Their expertise in handling various types of vehicles allows them to navigate around complex curves and angles, achieving a precise and immaculate look that might be challenging for an amateur to replicate.
Quality Materials
One of the most significant advantages of professional window tinting services is access to top-grade films that offer superior UV protection and a longer lifespan. These high-quality materials not only provide better protection against harmful UV rays but also maintain their effectiveness and appearance over time, ensuring that your investment in window tinting lasts.
Warranty Coverage
Another compelling reason to choose professional window tinting services is the assurance of warranty coverage. Many reputable providers offer warranties that protect against issues such as peeling off or fading. This not only provides peace of mind but also ensures that any potential issues down the line will be addressed without incurring additional costs.
Time Efficiency
Moreover, opting for professional tinting services saves you time and potential frustration. Trained technicians are well-equipped to carry out the installation process efficiently and swiftly. Their experience and familiarity with the techniques involved allow them to complete the task much quicker than an amateur could, enabling you to get back on the road with your newly tinted windows in no time.
Relying on professional tinting services doesn't just offer a convenient and efficient experience; it also ensures a high level of precision, durability, and quality that may not be achievable through DIY methods or amateur installations.
Car window tinting can truly transform your driving experience by enhancing comfort, safety, and style. Are you ready to give it a try? Contact
Official California Detailing today at (619) 760-4962 for professional window tinting services!
Share With Your Friends
Official California Detailing Blog